Page 1 of 10 123 ... LastLast
Results 1 to 10 of 98

Thread: Banner Tutorial - Paint Shop Pro

  1. #1
    Join Date
    Feb 2005
    Posts
    5,288
    Thanked: 92

    Arrow Banner Tutorial - Paint Shop Pro

    PAINT SHOP PRO TUTORIAL!!!!I have version 9.0 but i think they are all the same really!!!

    Lots of people have been asking how do make banners and Kat has explained but i thought i might as well do one for Paint Shop pro!

    This is how i make my banners, and it seems to work!!!

    so here goes,
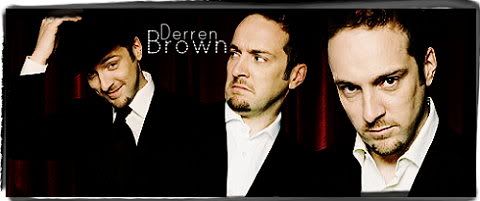
    I'll be making that banna (but i'll explain it in the easiest way then you can fiddle around as much as you want)

    Firstly, open a new File/docement what ever
    -File, new


    You'll need to make the dimensions about 524 X 124 Pixels!


    Then click ok, you should have a screen like this

    The Actual Banner (the white thing) may have grey and white squares on it don't worry that is ok!
    Last edited by Layne; 03-06-2005 at 11:13.

  2. #2
    Join Date
    Feb 2005
    Posts
    5,288
    Thanked: 92
    Next we need Pictures to go on to your banner, so click open and serch for your pictures:


    Once you've clicked on the pics you want they should all be on the screen like this


    For now minimize all the pics apart from the main white banner and one of your pics (the starting one)


    Now The bit you need to listen to and follow careFullly!!!

  3. #3
    Join Date
    Feb 2005
    Posts
    5,288
    Thanked: 92
    Right click onto your picture you want to put onto the banner,


    and click onto Copy,

    Then right click onto your banner, go down to paste then go down to PASTE AS NEW SECTION


    then move it around until the image is where you want it then left click to secure it ( please note once you have secured it you can not move it around!)

    Last edited by Layne; 03-06-2005 at 11:02.

  4. #4
    Join Date
    Feb 2005
    Posts
    5,288
    Thanked: 92
    So Now you have your first image so lets move on, minimize the image you just used and bring up the next image


    anmd we do excatly the same, copy, Paste As New section, but this time place the new picture maybe a bit on top of the one that is al;ready there so in my case Chrissie i'll be Overlapping Jake


    Dn't worry i have a plan!

    on the left side of PSP there are tools,About half way down there is one called the eraser tool, click on this


    Then a little circle cursor should appear, move this over to your overlapping banna and click onto it, a message will come up


    Ignore this and click ok

    Then go back to the banner, and click on part of the image that is overlapping (the bit that in my case is covering Jake's Face) now you should be able to rub this out, you can just keep clicking the mouse or you can hold it down


    Now You will see that The first picture is being seen again! Carry on erasing until you can see both pictures
    (you do not have to do this i just think it makes it lok a bit more bended though!


    TIP: Make sure you have rubbed out everything you want to, make sure you don't leave little marks over one of the pictures, i have done this before, and well it just makes it harder especially if ya find out at the end!!!

    Now carry on and follow the steps agin and paste all the pictures on to the banner,

  5. #5
    Join Date
    Feb 2005
    Posts
    5,288
    Thanked: 92
    Until it looks something like this:


    Right now, you have pasted all pics onto the banner, now you have to merge them so first go to Selections (at the top) and go down and click on Select None (sometimes you may have to click on select all then select none)


    Then go to Layers (along the top to) and scroll down to you come to Merge Hover over this for a second until the options come up then Click on Merge All (flatten)


    All this does is merges the images together so you can add text and stuff!

    now that is your banner done, That is how to make a basic banner!
    But i'm now going to show you how you do special effects and add Text!

    If you want to save the banner as it is make sure you save it as a JPEG image,
    So file, Save as, thenm tpye the name you want to acll it then make sure you save it as a JPEG image though oter wise it won't work!

    Last edited by Layne; 03-06-2005 at 11:06.

  6. #6
    Join Date
    Feb 2005
    Posts
    5,288
    Thanked: 92


    Finished piece so far!!!!!

  7. #7
    Join Date
    Feb 2005
    Posts
    5,288
    Thanked: 92
    Right, there are lots of different things you can do to your banners:

    Add Text
    Add Light
    Change Colour
    Soften
    Add frames
    Add pictures from tubes
    Use fancy brushes
    Rotate
    Different Diotortion effects

    Add new layers,
    Make a top layer see-through (like my banner)
    And i'm going to explain how to do these things on another thread that i'm opening, and if there is something i haven't explained please ask and i'll try!

  8. #8
    Join Date
    Feb 2005
    Location
    A very busy place?!
    Posts
    10,727
    Thanked: 65
    How to make stuff into jpeg etc? lol

  9. #9
    Join Date
    Feb 2005
    Posts
    4,486
    Thanked: 309
    no, no layne, please continue here
    this thread is a sticky


  10. #10
    Join Date
    Feb 2005
    Posts
    5,288
    Thanked: 92
    Quote Originally Posted by GhostRider
    no, no layne, please continue here
    this thread is a sticky
    Ok i will sorry!! Can ya please close the other thread!

Thread Information

Users Browsing this Thread

There are currently 1 users browsing this thread. (0 members and 1 guests)

Posting Permissions

  • You may not post new threads
  • You may not post replies
  • You may not post attachments
  • You may not edit your posts
  •